Installation & Support Resources
SmartWiper Installation Guide
Read all steps before beginning. This guide covers installation, wiring, Wi-Fi setup and the most common troubleshooting checks.
T30 Torx driver
Digital volt meter
Supplied blue 18–14 gauge T-tap
Pliers
Installation steps
1
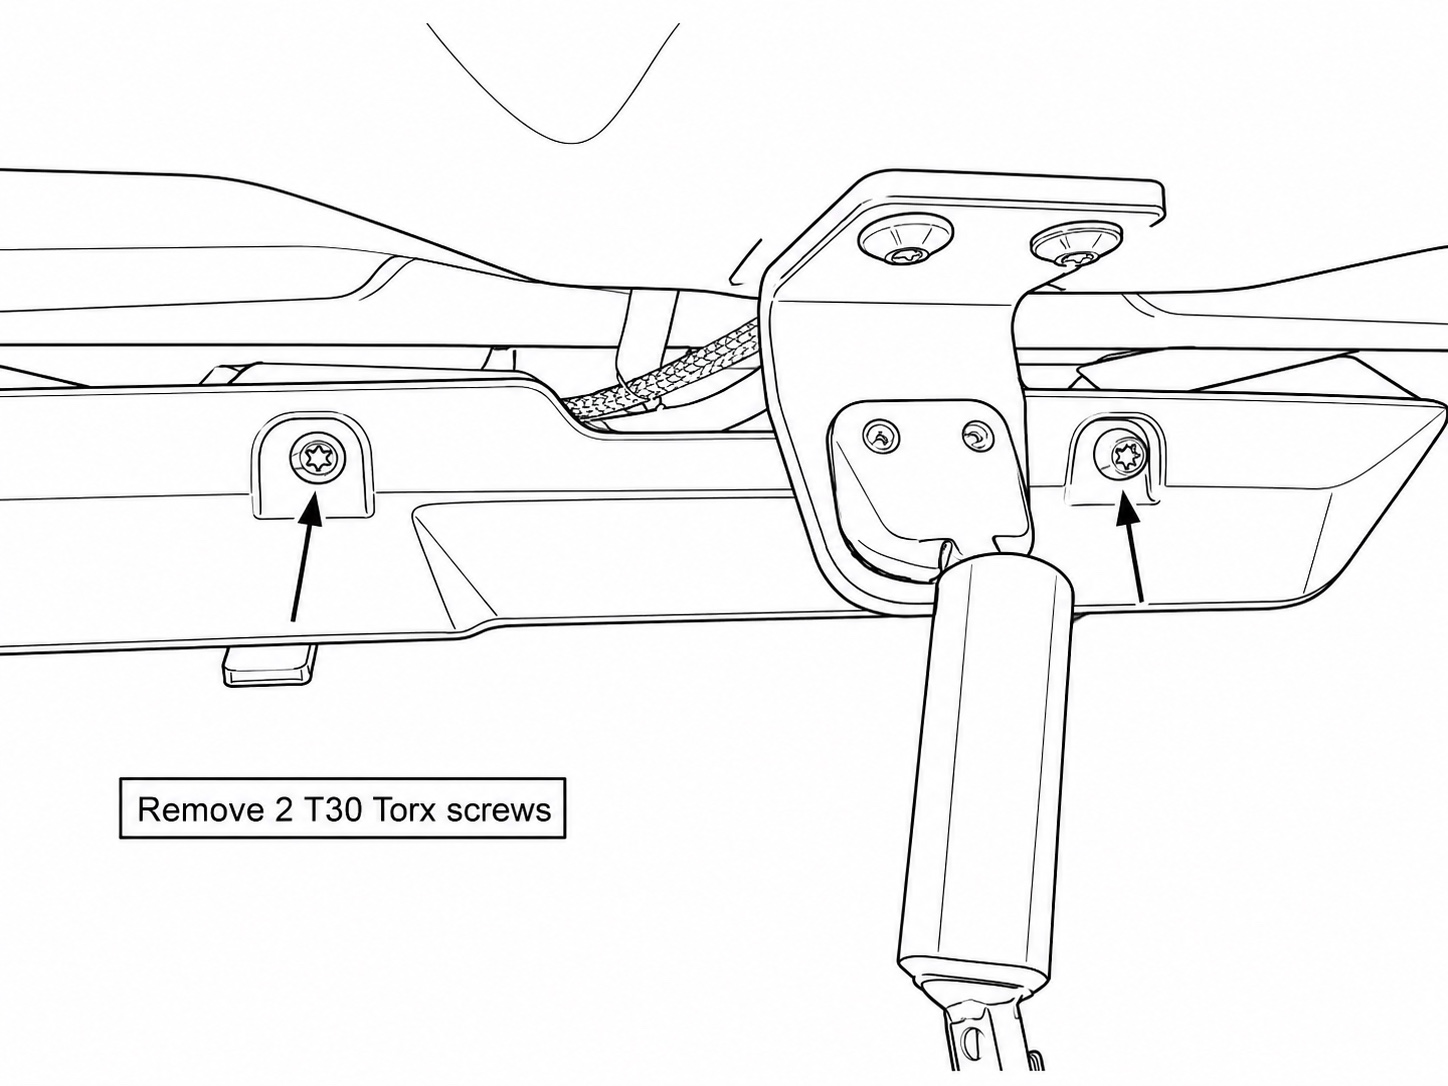
Remove two T30 Torx screws
Remove the two T30 Torx screws securing the rear portion of the overhead enclosure cover.
2
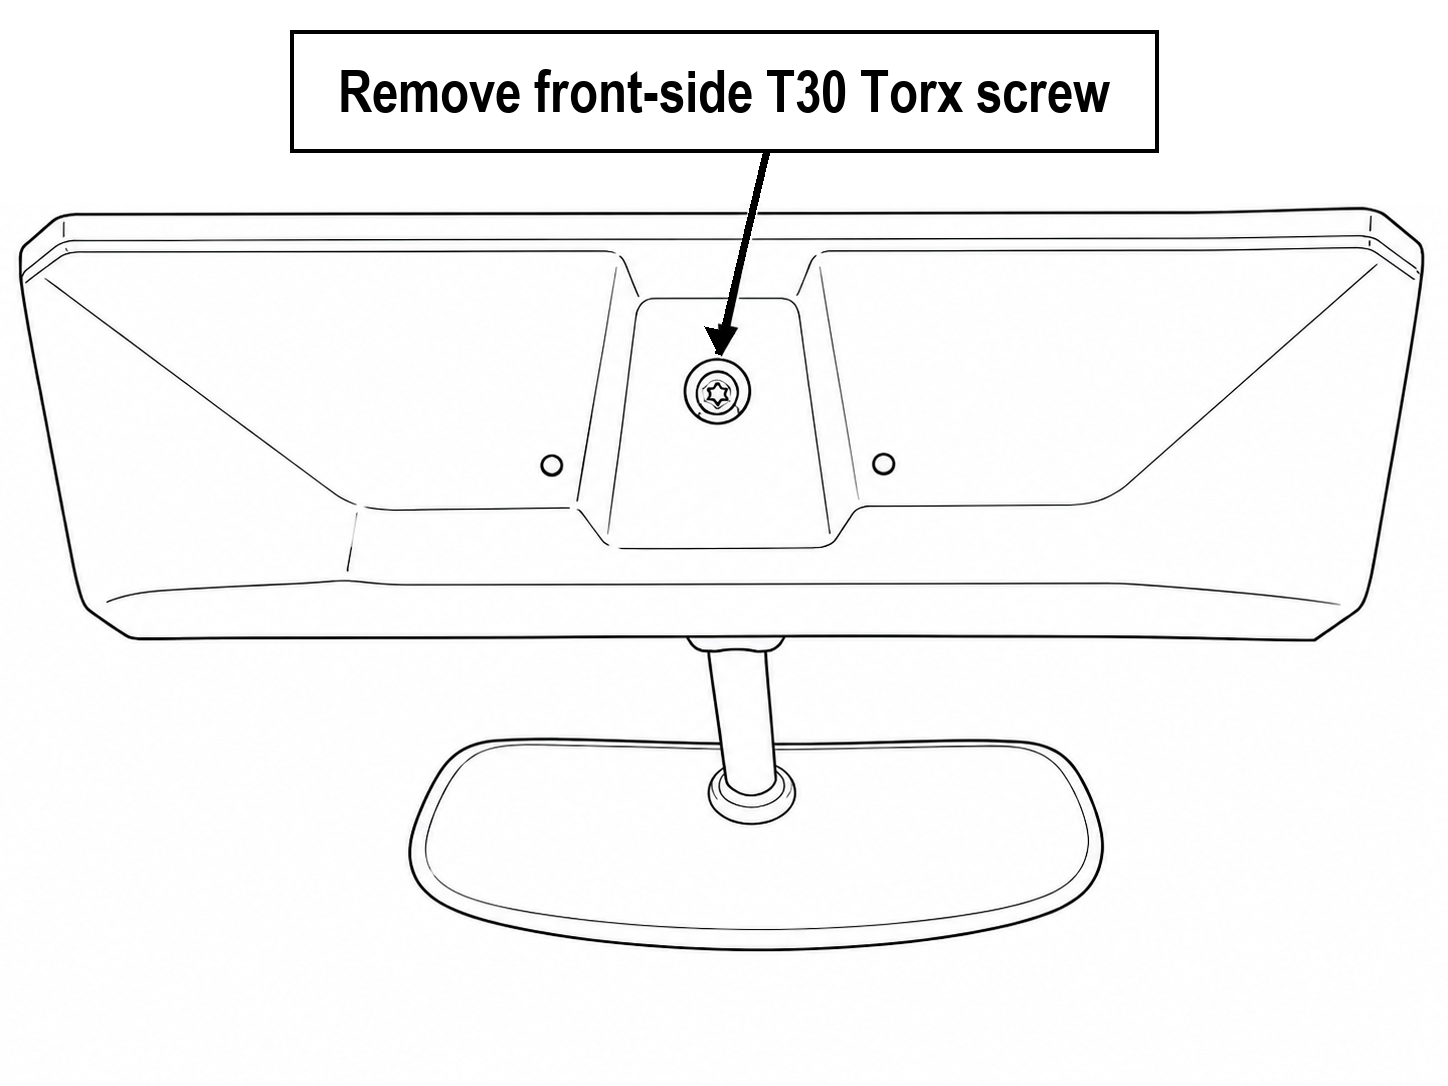
Remove the front-side screw
Remove the single front-side T30 Torx screw, then carefully lower the enclosure cover.
3
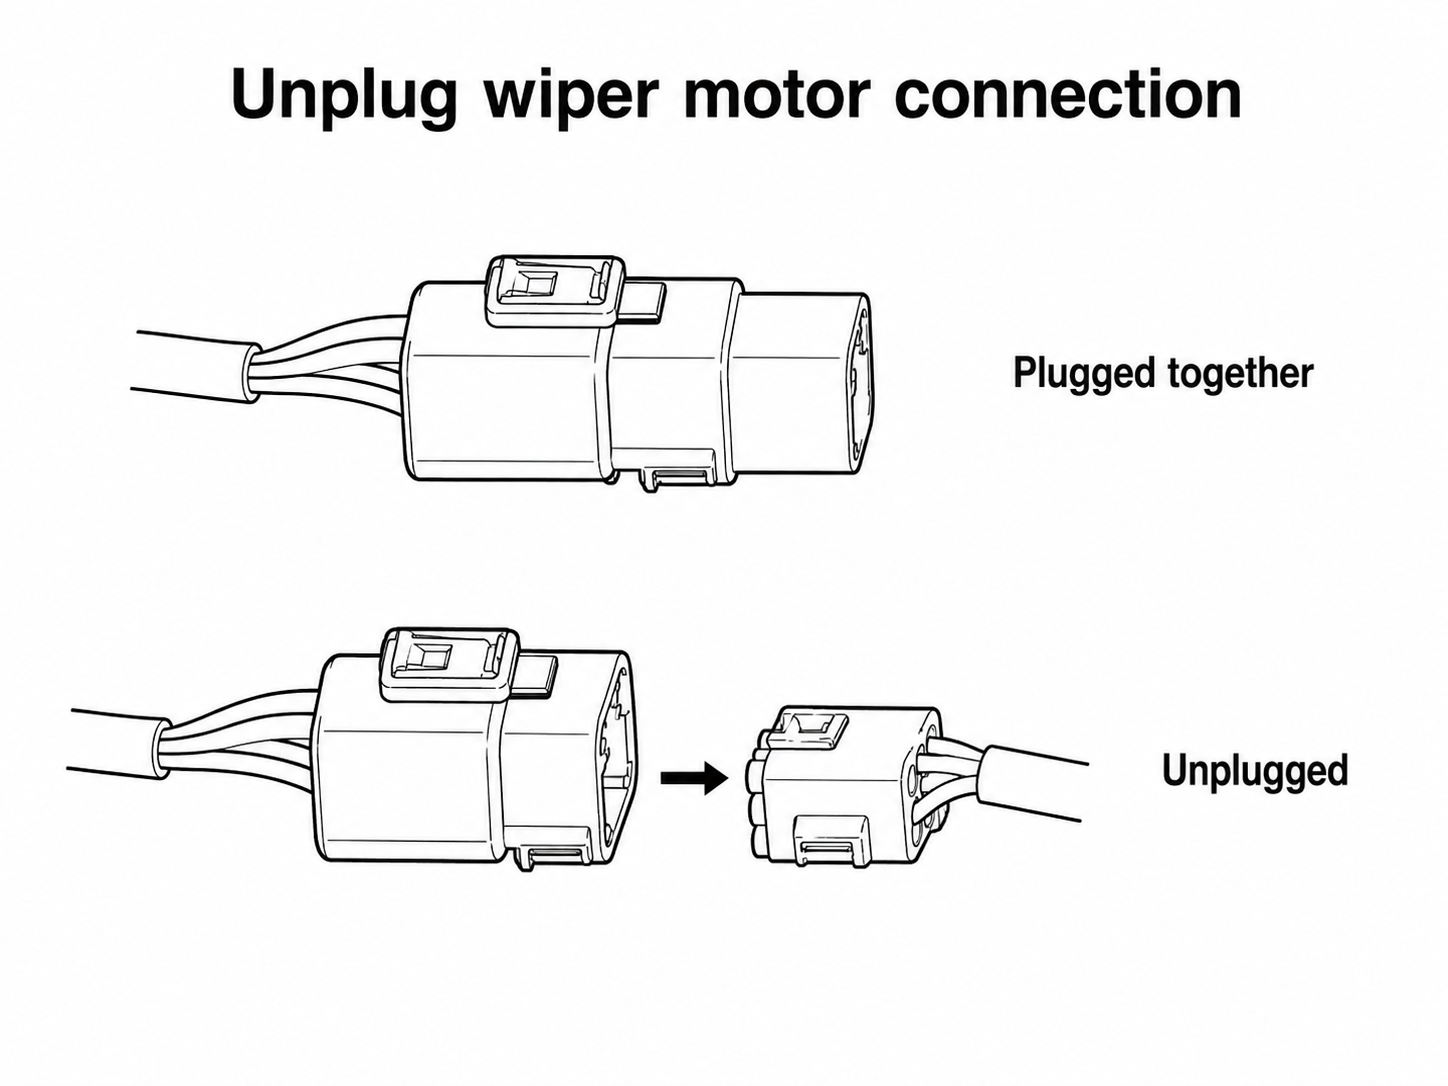
Unplug the wiper motor connection
Release the connector lock and unplug the factory wiper motor connection. Do not pull directly on the wires.
4
Connect the washer trigger wire
- Locate the white washer-trigger wire on the back of the washer/wiper switch connector. Reference only: 2026 = Terminal 2; 2024 = Terminal 6.
- Meter-test the white wire before clamping. It must measure ground normally and approximately 12 volts only while the washer switch is activated.
- Once the meter test passes, clamp the supplied blue 18–14 gauge T-tap around that verified white wire. Do not cut or strip the factory wire.
- Use pliers to close the T-tap fully until it latches.
- Push the pink female spade on the Smart Wiper washer trigger wire straight into the T-tap's blue receptacle until fully seated.
Meter test required before connecting. Terminal position is only a model-year reference; an incorrect connection may damage the unit.
5
Connect and refit SmartWiper
- Connect the SmartWiper harness between the factory connectors.
- Locate the SmartWiper box as shown in the drawing above.
- Keep all wires uncrossed and clear of the enclosure cover. A few positioning attempts may be required.
Confirm the cover fits freely with no wire restrictions or pinched wiring. Reposition the box or harness as required, then reinstall all three T30 Torx screws.
Setup and support
Wi-Fi & Dashboard Setup
NetworkSmartWiper
Factory passwordanimal123
Dashboard192.168.4.1
- Connect your phone to the SmartWiper Wi-Fi network.
- If your phone reports that the network has no internet connection, stay connected. SmartWiper uses a direct local connection.
- Open http://192.168.4.1 in your phone's web browser.
- Choose the desired settings and change the factory Wi-Fi password after installation.
Watch dashboard connection & password setup ↗
Troubleshooting
- Cover will not fit: Re-route the box and wires until the cover closes freely. Never pinch wiring.
- No SmartWiper response: Confirm both harness connectors are fully seated and verify power and ground.
- Delay function not working: Confirm the blue T-tap is fully latched around the meter-verified white washer-trigger wire and the pink female spade is fully seated on its blade.
- No 12 volts while testing: Recheck the meter ground and confirm the washer is actively commanded.
- Wi-Fi not found: Confirm the unit has power, move closer to the vehicle and restart the ignition.
- Cannot log in: New units use the factory password
animal123. If you previously changed it, use your custom password.
- Forgotten Wi-Fi password: Turn keyed power off, hold the washer switch, turn keyed power on, keep holding for at least 3 seconds, then release. The Wi-Fi password returns to
animal123; all wiper settings remain unchanged.
Firmware Updates
- Supported connection: Update within range of a normal internet-connected 2.4 GHz Wi-Fi network, such as your home, shop or dealer network.
- Park the vehicle, turn the engine and wipers off, and leave stable keyed/accessory power on during the complete update.
- Connect your phone to the SmartWiper network, open http://192.168.4.1, choose Check for Firmware Update, then enter the nearby Wi-Fi network name and password exactly.
- SmartWiper temporarily leaves its own Wi-Fi network while checking and installing the signed update. The dashboard disconnecting and the controller rebooting are normal.
- After approximately one minute, reconnect your phone to the SmartWiper network and reopen http://192.168.4.1 to confirm the installed version.
- Phone hotspot limitation: Using the same phone for both the SmartWiper dashboard and its hotspot is not supported because the required Wi-Fi handoff is unreliable.
- Optional field method: A second phone or dedicated hotspot may provide the internet connection when configured for 2.4 GHz, while another phone operates the SmartWiper dashboard.